Custom templates
Custom templates represent the pinnacle of personalization and adaptability in AI. These templates allow you to train the AI to understand the specific structure of your documents with just five examples, and allow for the integration of human input to create highly personalized solutions and extract only the information you want. Ideal for documents with less common structures, custom templates allow you to achieve optimal results in unique situations. They are the perfect choice for those seeking maximum customization and precision in document processing.
When should I use custom templates?
Custom templates should be used when standard templates fail to produce satisfactory results.
Standard templates use predefined labels to extract text from documents, but sometimes they fail to make a correct association between the text and the labels, especially when dealing with documents with complex or unclear structures.
In such situations, it is possible to create a custom model to train artificial intelligence (AI) to read these documents correctly. You can think of the custom model as a container in which you can insert several examples of a document with the same structure but different data. For this document, you can specify where to find the desired information and what name to give to each label. This step is essential to ensure correct reading by your business management system (ERP) or your customer relationship management (CRM) system.
Once the AI has been trained to read documents similar to those loaded into the “container” of the custom model, you need to select the “Start Scan” menu item and then choose “custom templates”. This way, Retica will be able to correctly identify and associate the text of the documents with the labels defined during the training of the custom model.
Thanks to this process, Retica will be able to correctly recognize the texts in the documents you want to process, since it will identify similar and already labeled documents in the container of the selected custom model.
Custom model input requirements
First, ensure that your training dataset meets the input requirements:
- For best results, we recommend providing clear images or high-quality analytics for each document.
- The following file formats can be processed: PDF, JPEG/JPG, PNG, BMP, TIFF, HEIF.
- For PDF and TIFF files, the maximum processing capacity is 2000 pages. Also, ensure that the file size for document analytics does not exceed 500 MB.
- The image dimensions must be in the range of 50 x 50 pixels to 10,000 px x 10,000 pixels.
- If your PDF files are password protected, it is essential to remove the password before submitting them.
- For text extraction, consider that the minimum height should be 12 pixels in a 1024 x 768 pixel image, which is approximately 8 points at 150 dots per inch (DPI).
- For training custom models, the maximum page limit for training data is 500.
Optimal Training Data
Training input data is the foundation of any machine learning model. It determines the quality, accuracy, and performance of the model. Therefore, it is critical to create the best possible training input data. Here are some tips for effectively training models:
- Use text-based PDFs instead of image-based PDFs whenever possible. One way to identify an image-based PDF is to try to select specific text in the document. If you can only select the entire image of the text, the document is image-based, not text-based.
- Use forms with all available fields filled in.
- Use forms with different values in each field.
- If the images are of low quality, use a larger dataset, that is, more than five training documents.
- Determine whether you need to use a single model or multiple models compounded into a single model.
- If the form has variations with formats and page breaks, consider segmenting the dataset to train multiple models.
- Custom forms are based on a consistent visual model.
- Make sure you have a balanced data set considering formats, document types and structure.
Creating a custom template
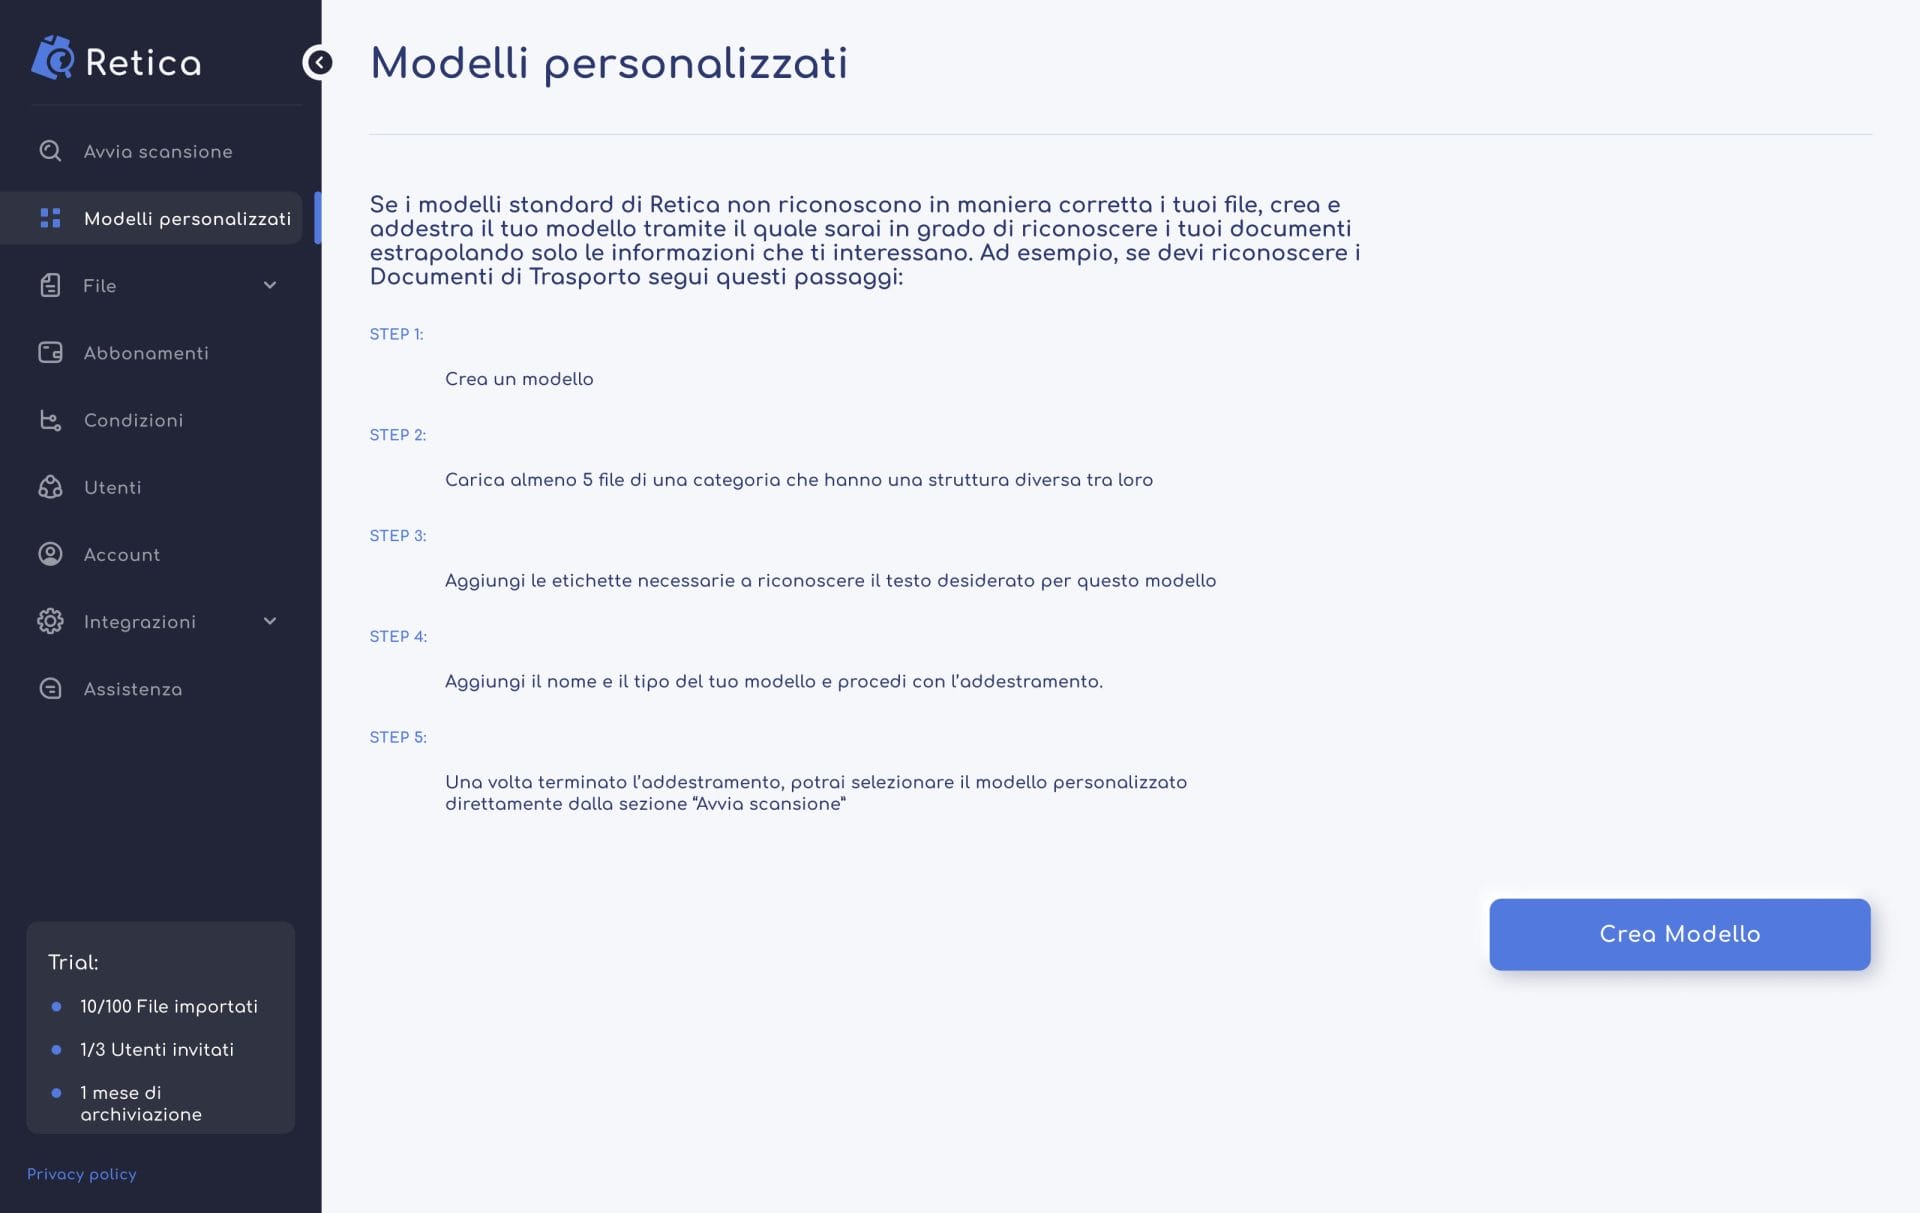
To create a new custom template, you need to select the “Custom Templates” section from the left menu, and when the interface opens, press the “Create Template” button.
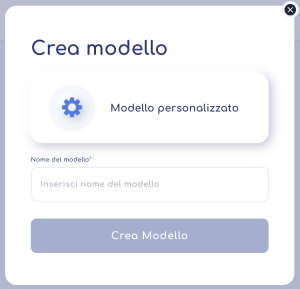
Once you press the “Create Template” button, a pop-up window will appear where you will need to enter the name of your custom template. This will be used as the template’s identifier.
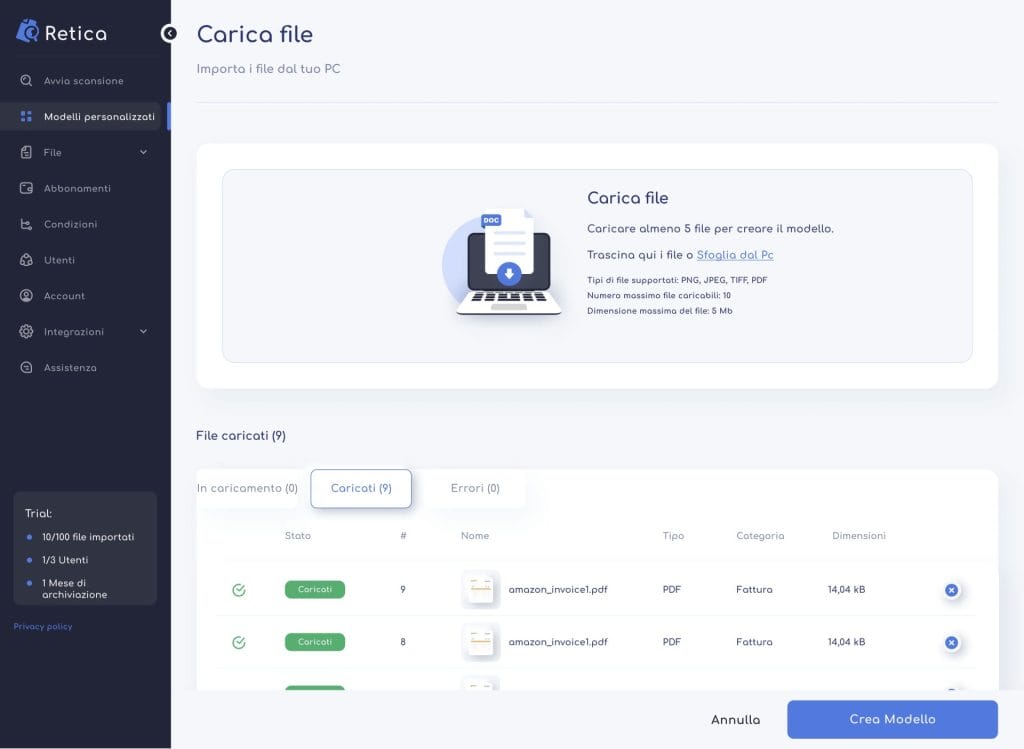
Once you have created your new custom model, you need to upload at least five documents with different layouts in order to start the training process. It is important to note that the greater the amount of documents imported and mapped, the greater the level of accuracy obtained by your custom model.
To proceed, you need to choose whether you want to manually import the documents or use the FTP protocol, after checking the integration of the latter. Once you have chosen, simply upload the models that you intend to use as examples for training the artificial intelligence and press the “Create model” button.
Training a custom model
The created model will be shown in the main table with TO BE TRAINED status.

For each model there will be an “Options” button that allows you to change the name of the model or delete it, and an arrow button that when pressed shows the documents used to train the chosen model.
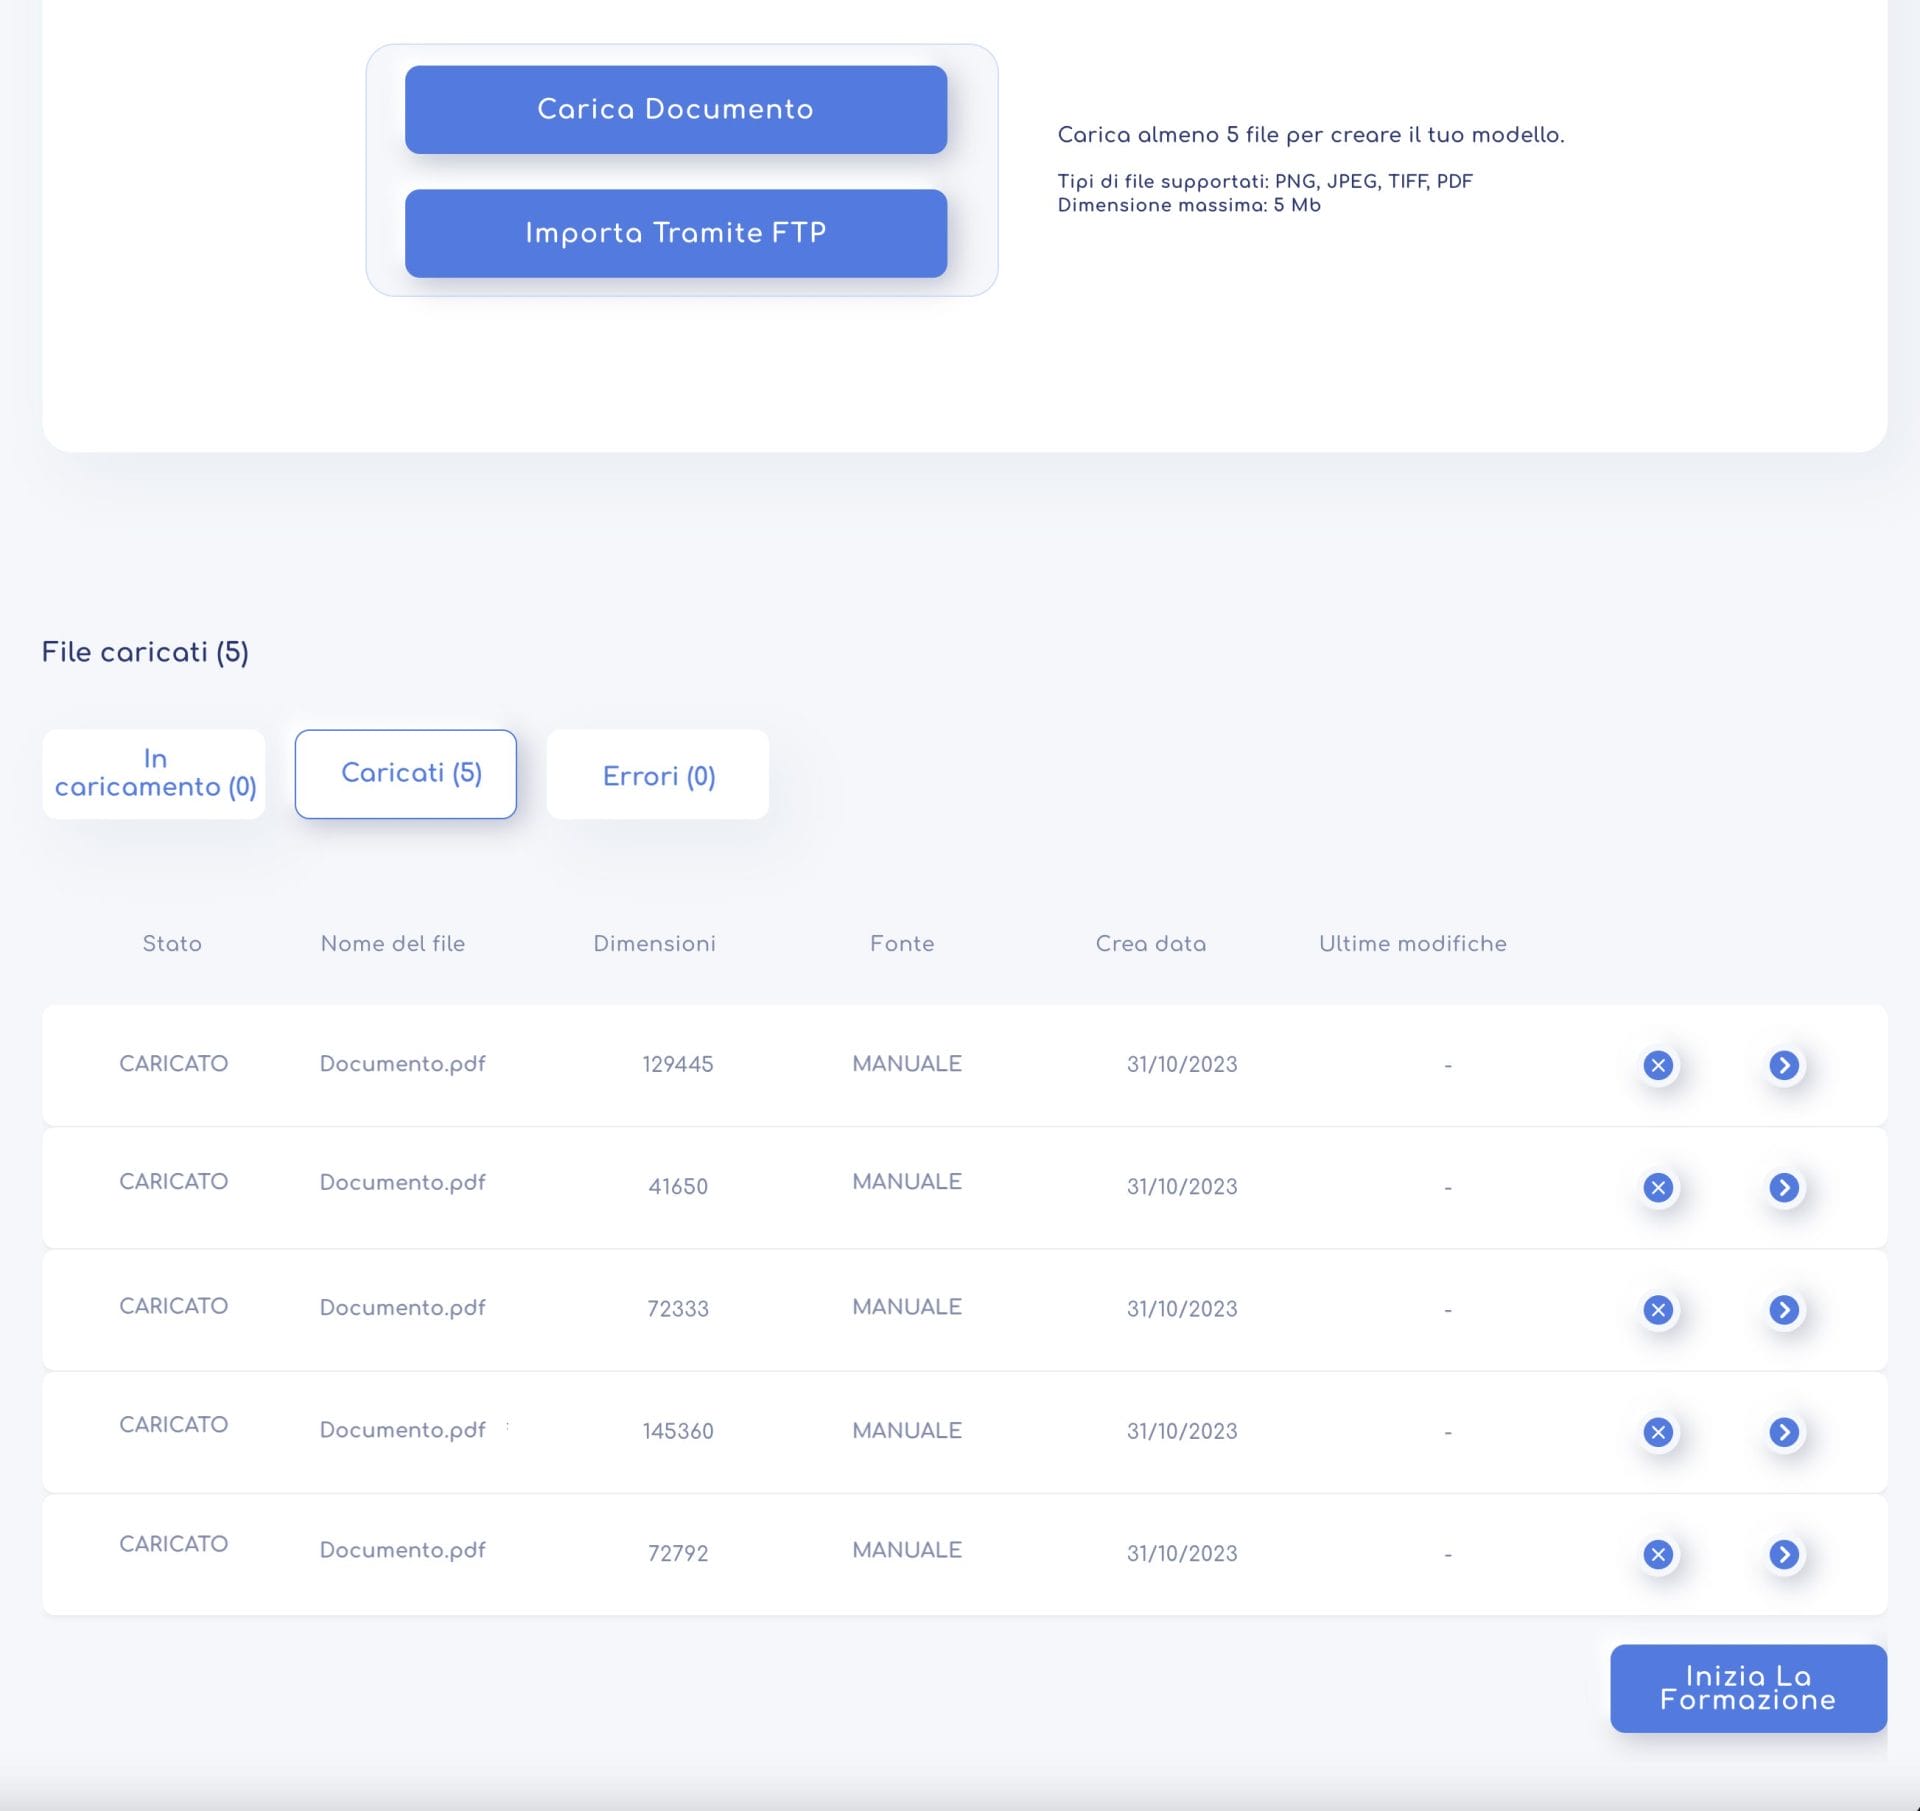
As shown in the image, all previously uploaded templates will be listed in a table, each with specific information to help the user understand their status.
For each document, you will find two buttons: the first is used to delete the document, while the second allows you to access the document to create, edit or delete labels or tables within it.
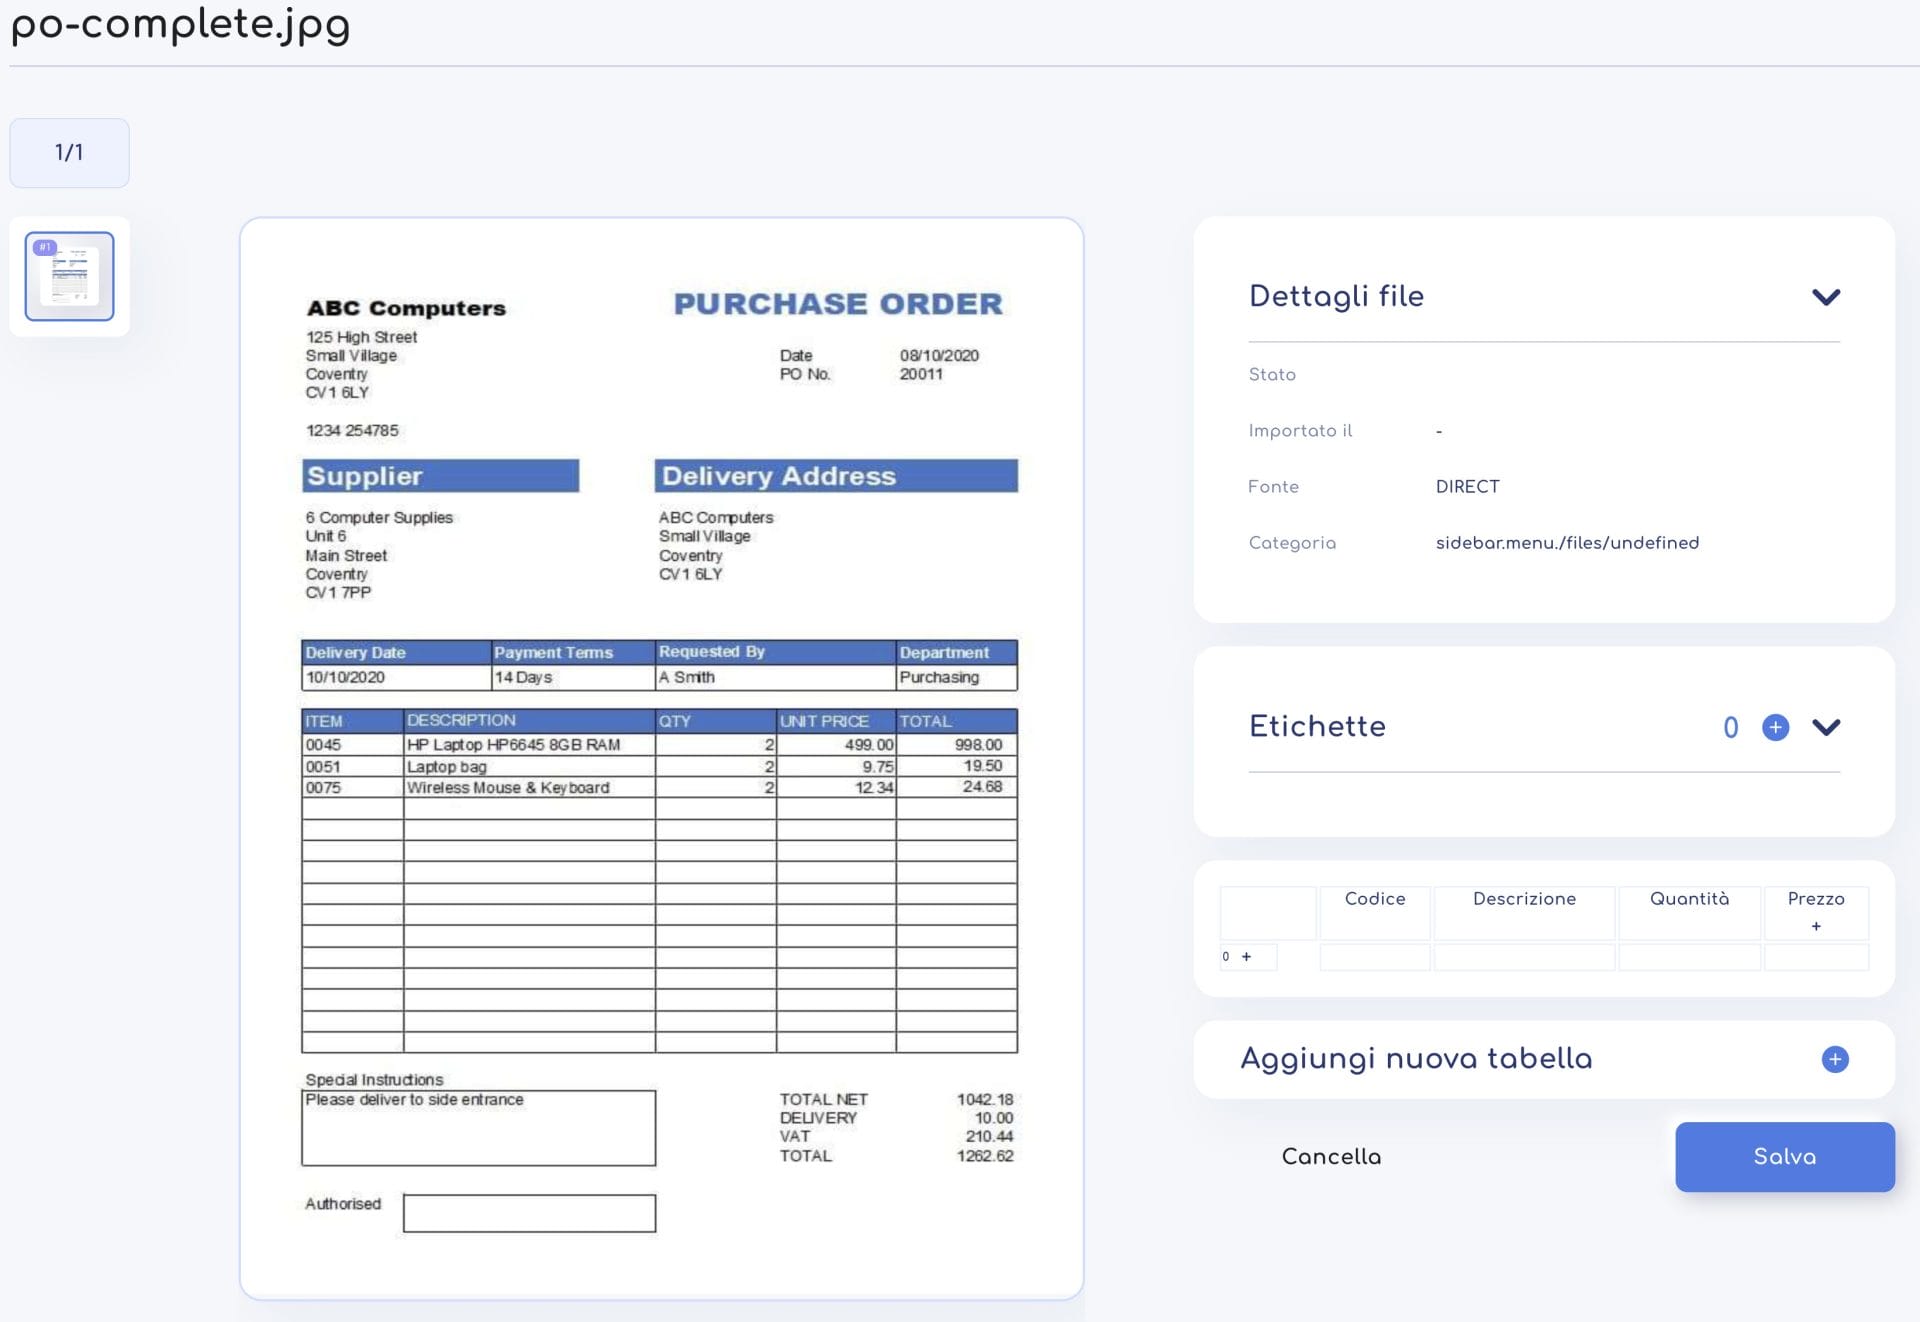
When you first label, the template will not have any pre-set tables or labels.
The work to be done is to select the texts to be identified in the documents.
To add a new label, select a portion of text with the mouse and click on it. A window will open in which you will have to enter the name of the label (for example: “Company name”). Make sure that the name of the label is unique.
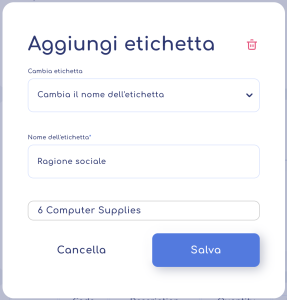
The inserted labels will be visible on the right, in the “labels” block.
Once you have finished inserting the labels, you can choose whether you also want to detect the content of one or more tables. To do this, you must first press the “+” button next to the text “add new table”, this will bring up a window that will ask for the name of the table.
Once inserted and confirmed, Retica will show a new empty table that must be structured:

To structure the table you need to select the number of columns you want to use, to do this you must first press the “+” button in the column header, doing so will create a new column.
This action must be repeated until you reach the number of columns necessary for a correct (and personalized) data extraction.
The next step is to rename the columns using texts useful for understanding their content (Item code, description, …), to do this just press on the name of the column and through a convenient pop-up it will be possible to assign it a new name.

To fill in the table, you need to select the text you want to extract from the document (for example, the text contained in the first row and first column of the table), and after creating the blue box on the text, press on the cell of the previously created table to allocate the text in that position.
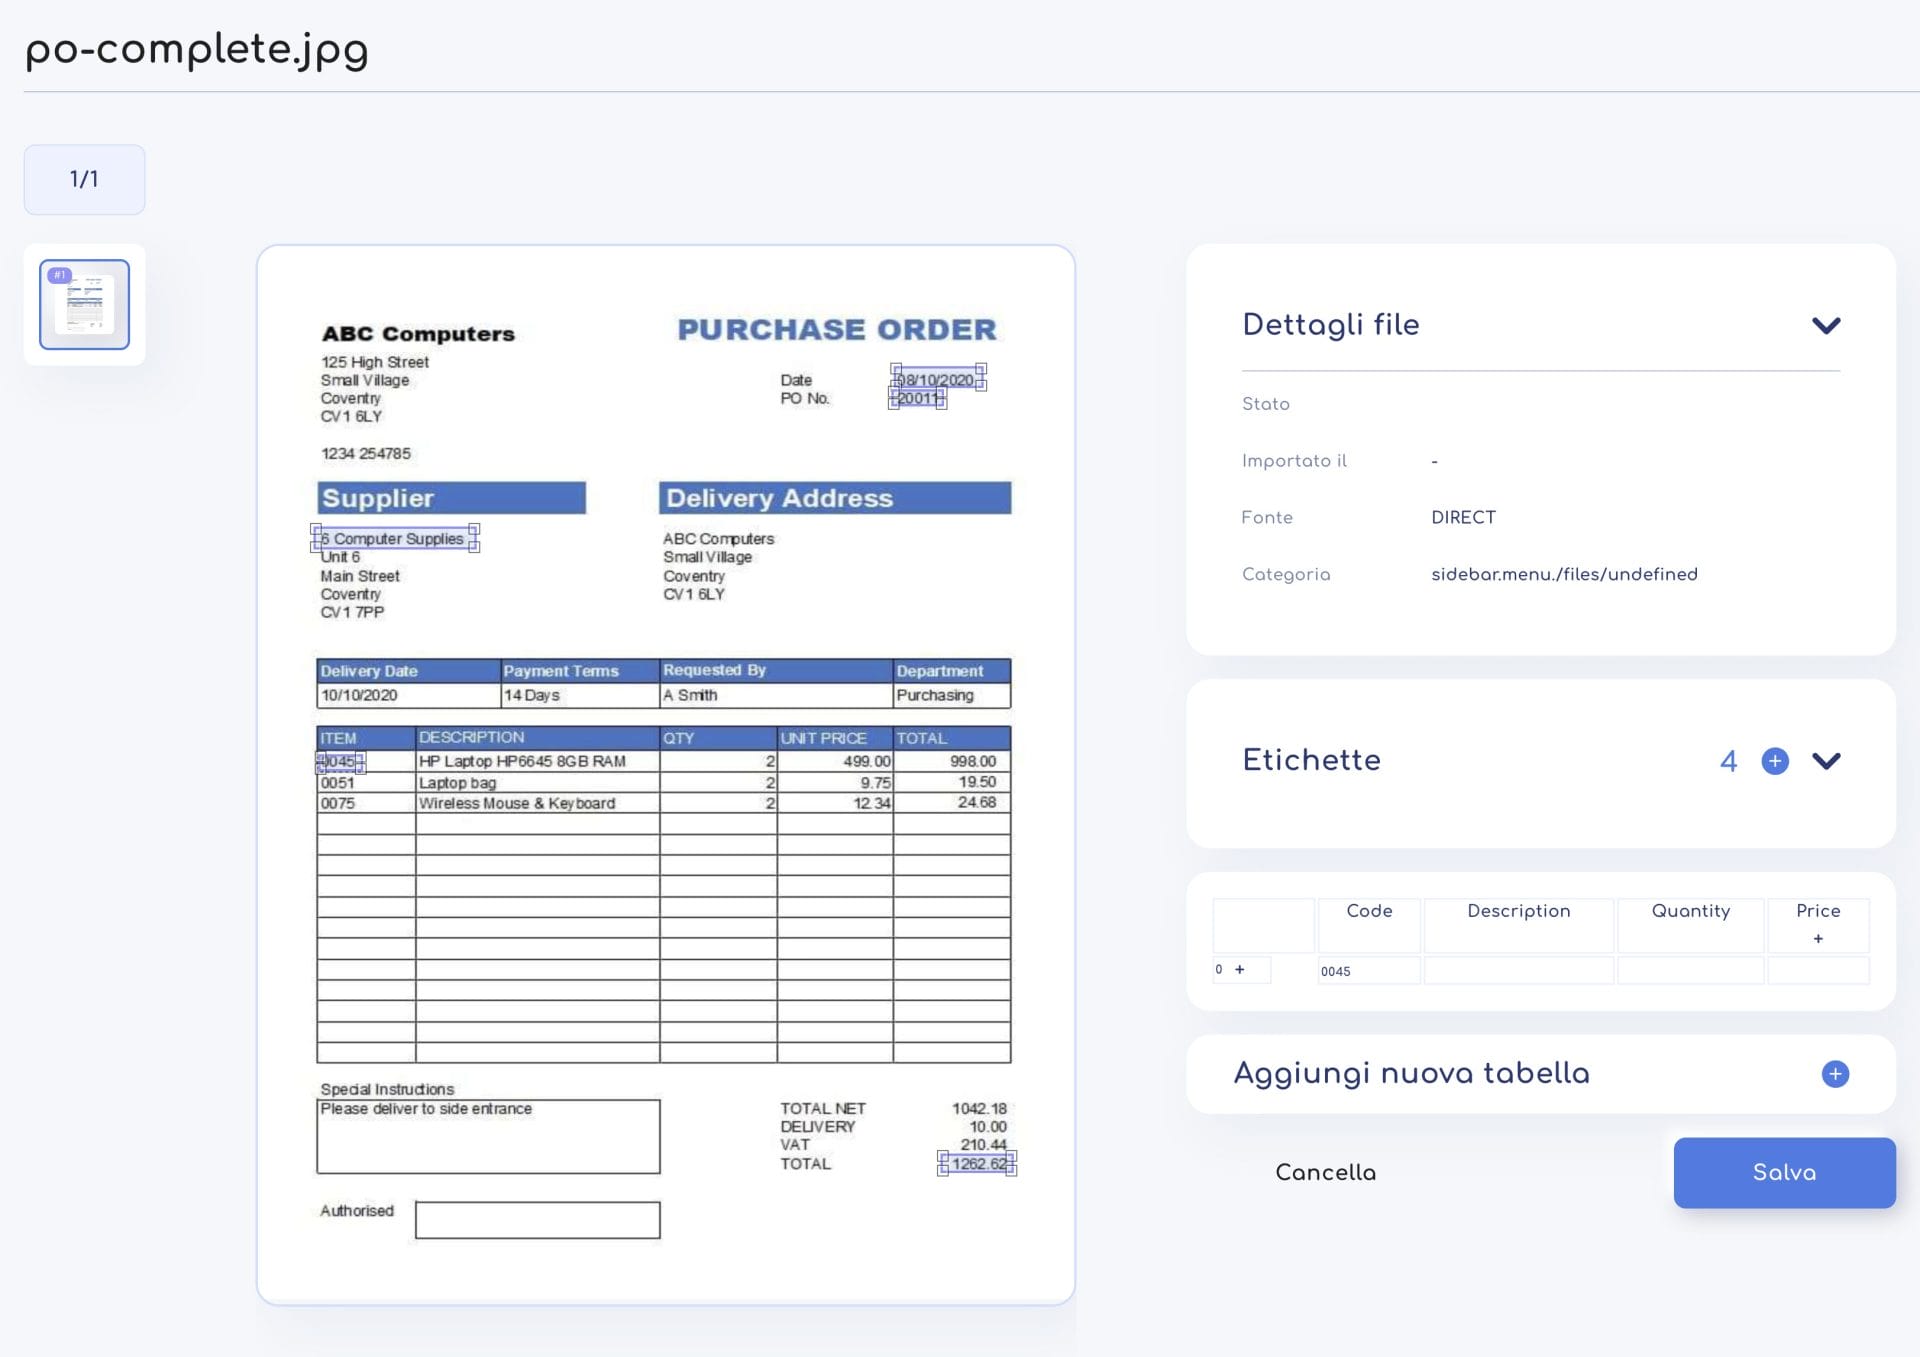
Repeat this operation for all the texts that you want to extract from the first row of the document table.
Next you need to add other rows to the table that we have built, to do this just press the “+” button under the number of the last row of the table. Repeat the same procedure of inserting texts into the table for all the necessary rows.

Once you have finished labeling, press the “Save” button.
You will have to follow the same process for all the other documents you intend to import. To simplify this operation, Retica will show the same labels and tables with the same structure present in the first mapped document. These will not initially be associated with any text, but it will be sufficient to select the text in the document and recall the name of the label via the dedicated popup.
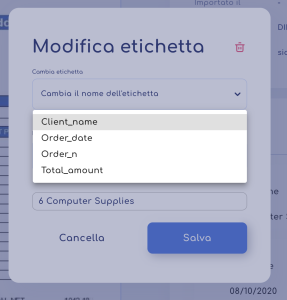
Once you have labeled all the documents with the information you want to extract, Retica will activate the “Start Training” button located below the document list.
The training process will only take a few minutes, and you will know it is complete when the model status, displayed in the table of custom models created, changes from “IN TRAINING” to “TRAINED”.

Using custom templates you create
To extract information from a document using a previously customized model, you need to select the “Start Scan” item in the left menu and select the “Custom Model” item from the available choices.
A pop-up will appear showing the list of trained custom models, and you will need to select the model you want to use by pressing on the model name.
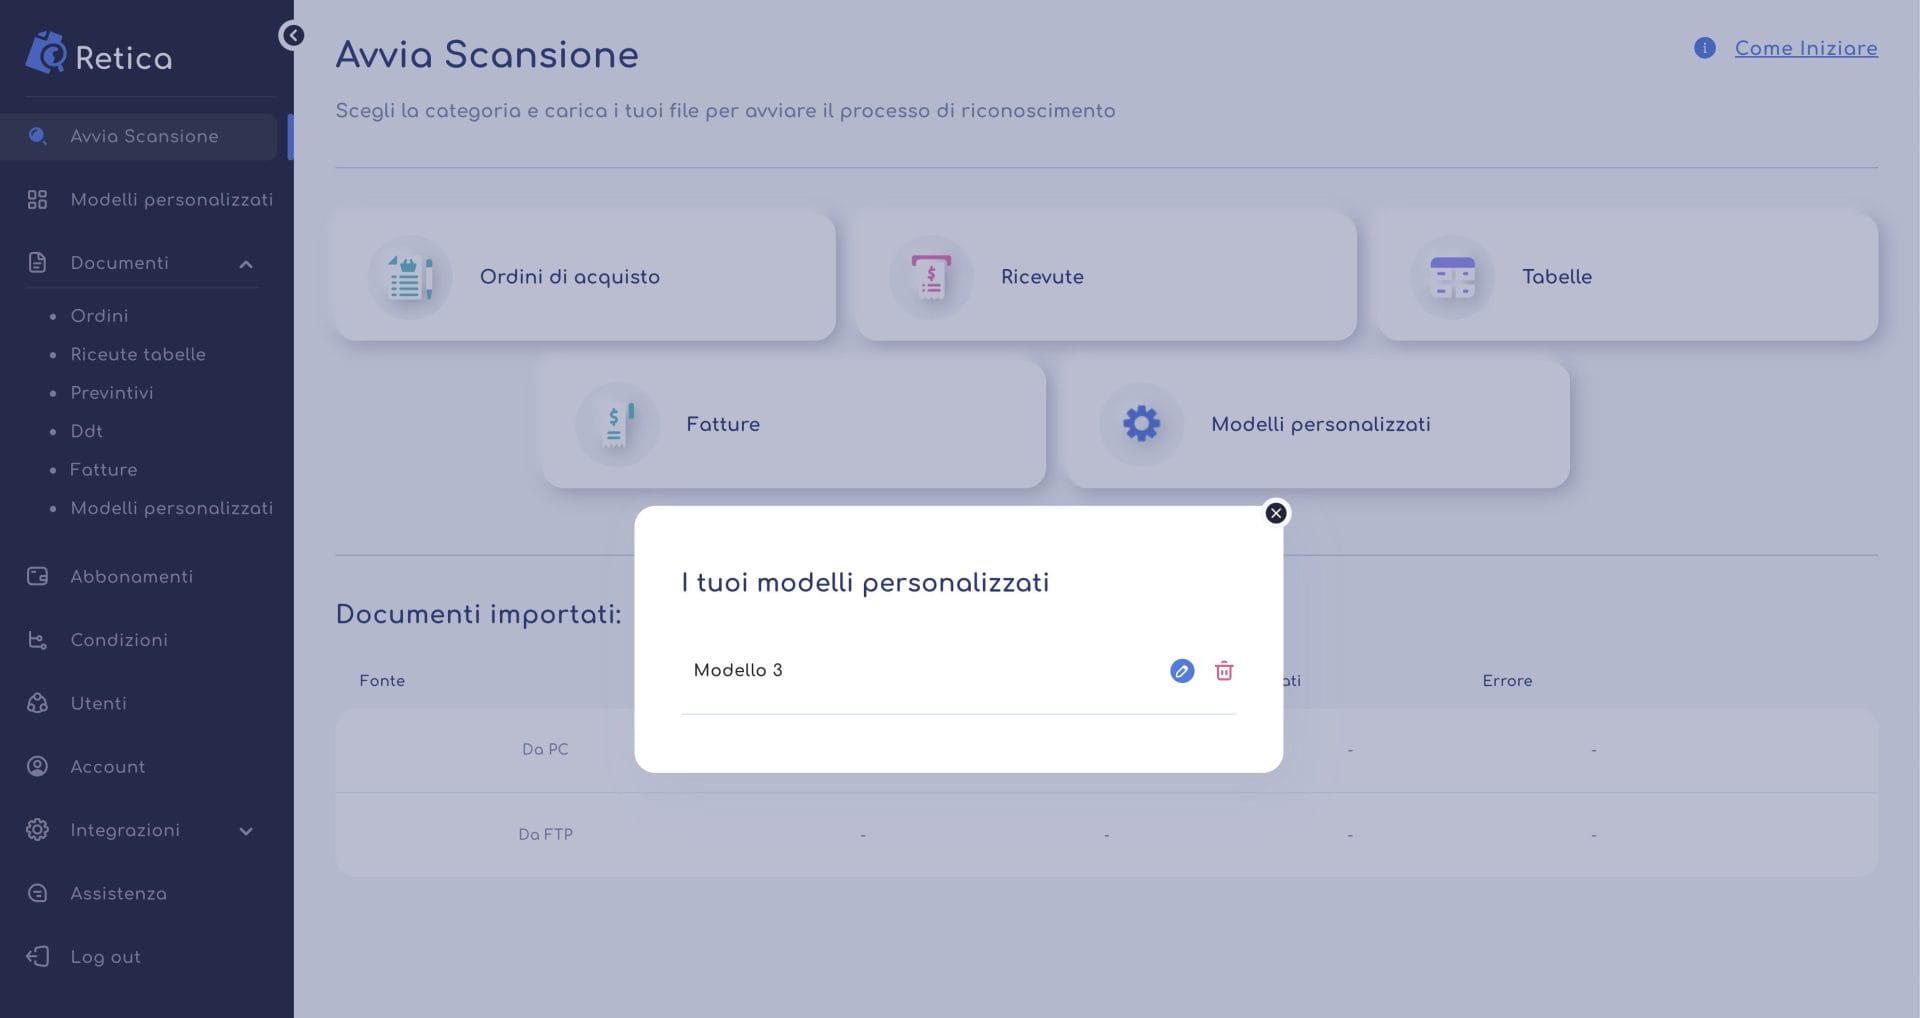
After choosing the template, you need to import the desired documents. For detailed instructions on how to import documents correctly, visit the page: https://retica.ai/import-documents/
Once the import of documents and their processing are complete, you will be able to export the extracted information in the available formats.
Please note that only the information associated with the labels and tables created in the custom templates will be extracted. If the text extraction is not as accurate as desired, it is advisable to review the labeling of the documents already present in the custom template, and add more examples with different structures to improve the correct identification of the texts to be extracted.


