Edit documents
Scanning documents is necessary when you want to edit a Recognized document or when you need to map labels for an Unrecognized document.
Overview
The interface for editing or mapping documents is composed of several features.
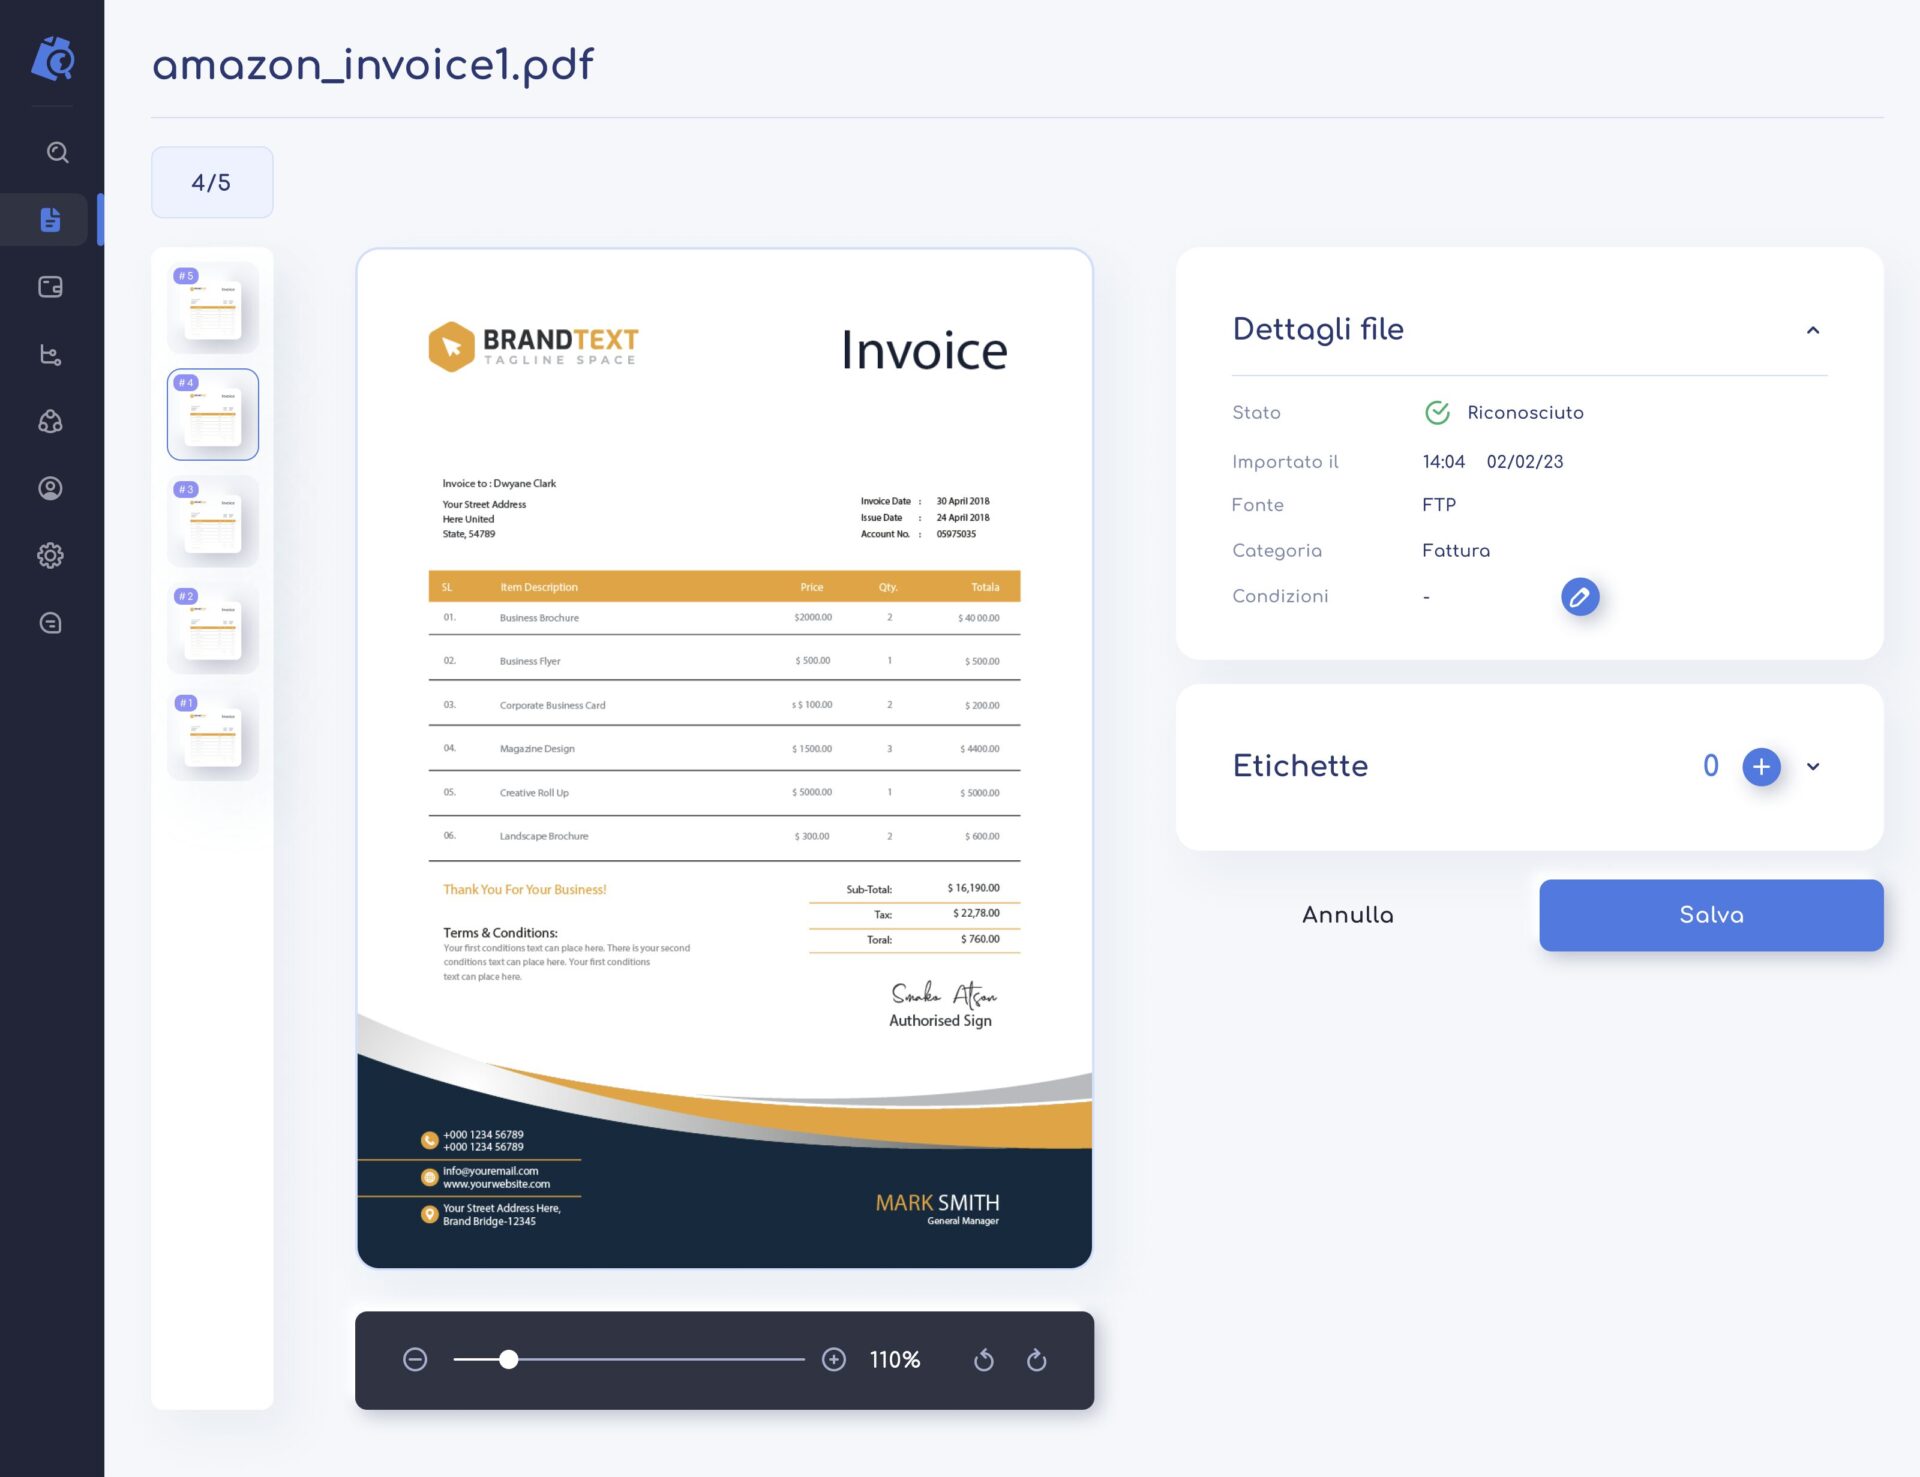
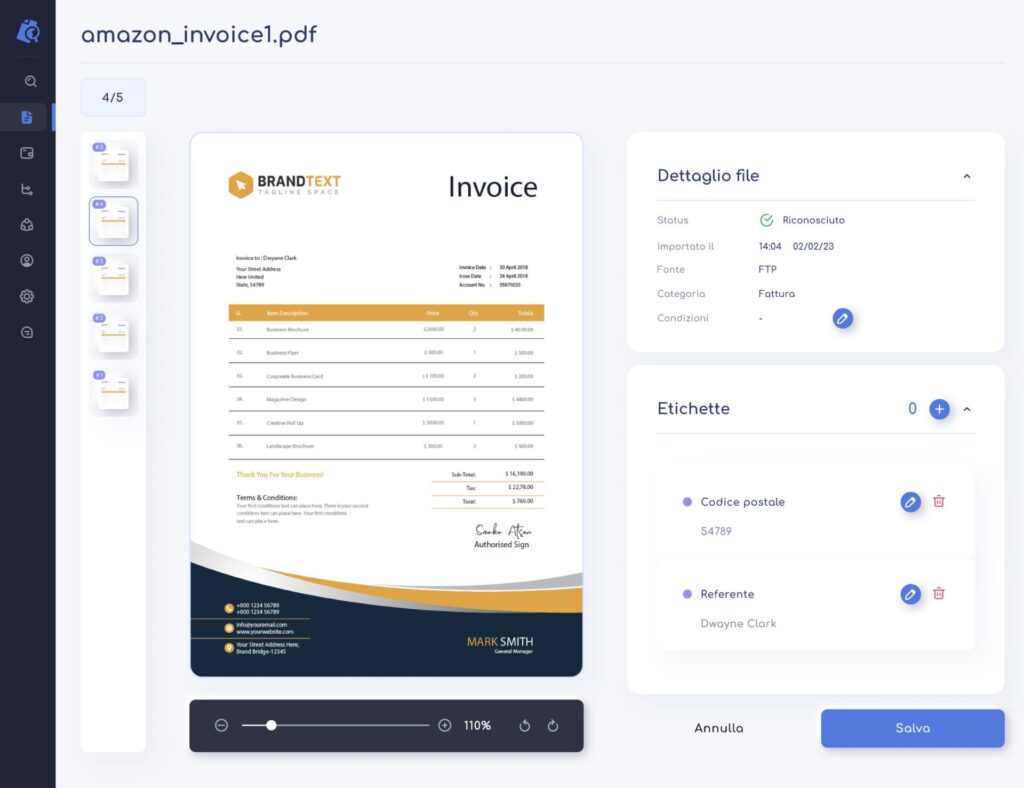
As you can see in the image below, the screen will be divided into two main areas, the first is the preview of the document (left part), the second is composed of the information extracted from it (right part).

On the left of the document page you want to edit, there is a bar that lists all the pages that make up the document. By pressing on one of these pages, you can change the page to edit.
Below the document page you want to edit, there is a bar used for zooming. This can be used to enlarge or reduce the document page depending on the desired view.
On the right side of the screen, a first block containing the document information (not editable) is displayed. Below this, there is a second block dedicated to the texts detected by Retica (editable).
There are three buttons on the screen: “Export file” at the top right, “Cancel” and “Save” at the bottom right.
The “Export file” button is used to export the data extracted from the document and follows the normal export flow described in the “Document Management” section. It allows you to choose the type of extraction, either manual or via FTP, and the document format.
The “Cancel” button returns the user to the document table without saving the changes made.
The “Save” button, on the other hand, returns the user to the document table and saves the changes made.
Text Detection
To detect text and assign it to a label, you need to click with the mouse on the part of the text that you want to identify within the document page and create a colored box that includes all the desired text.
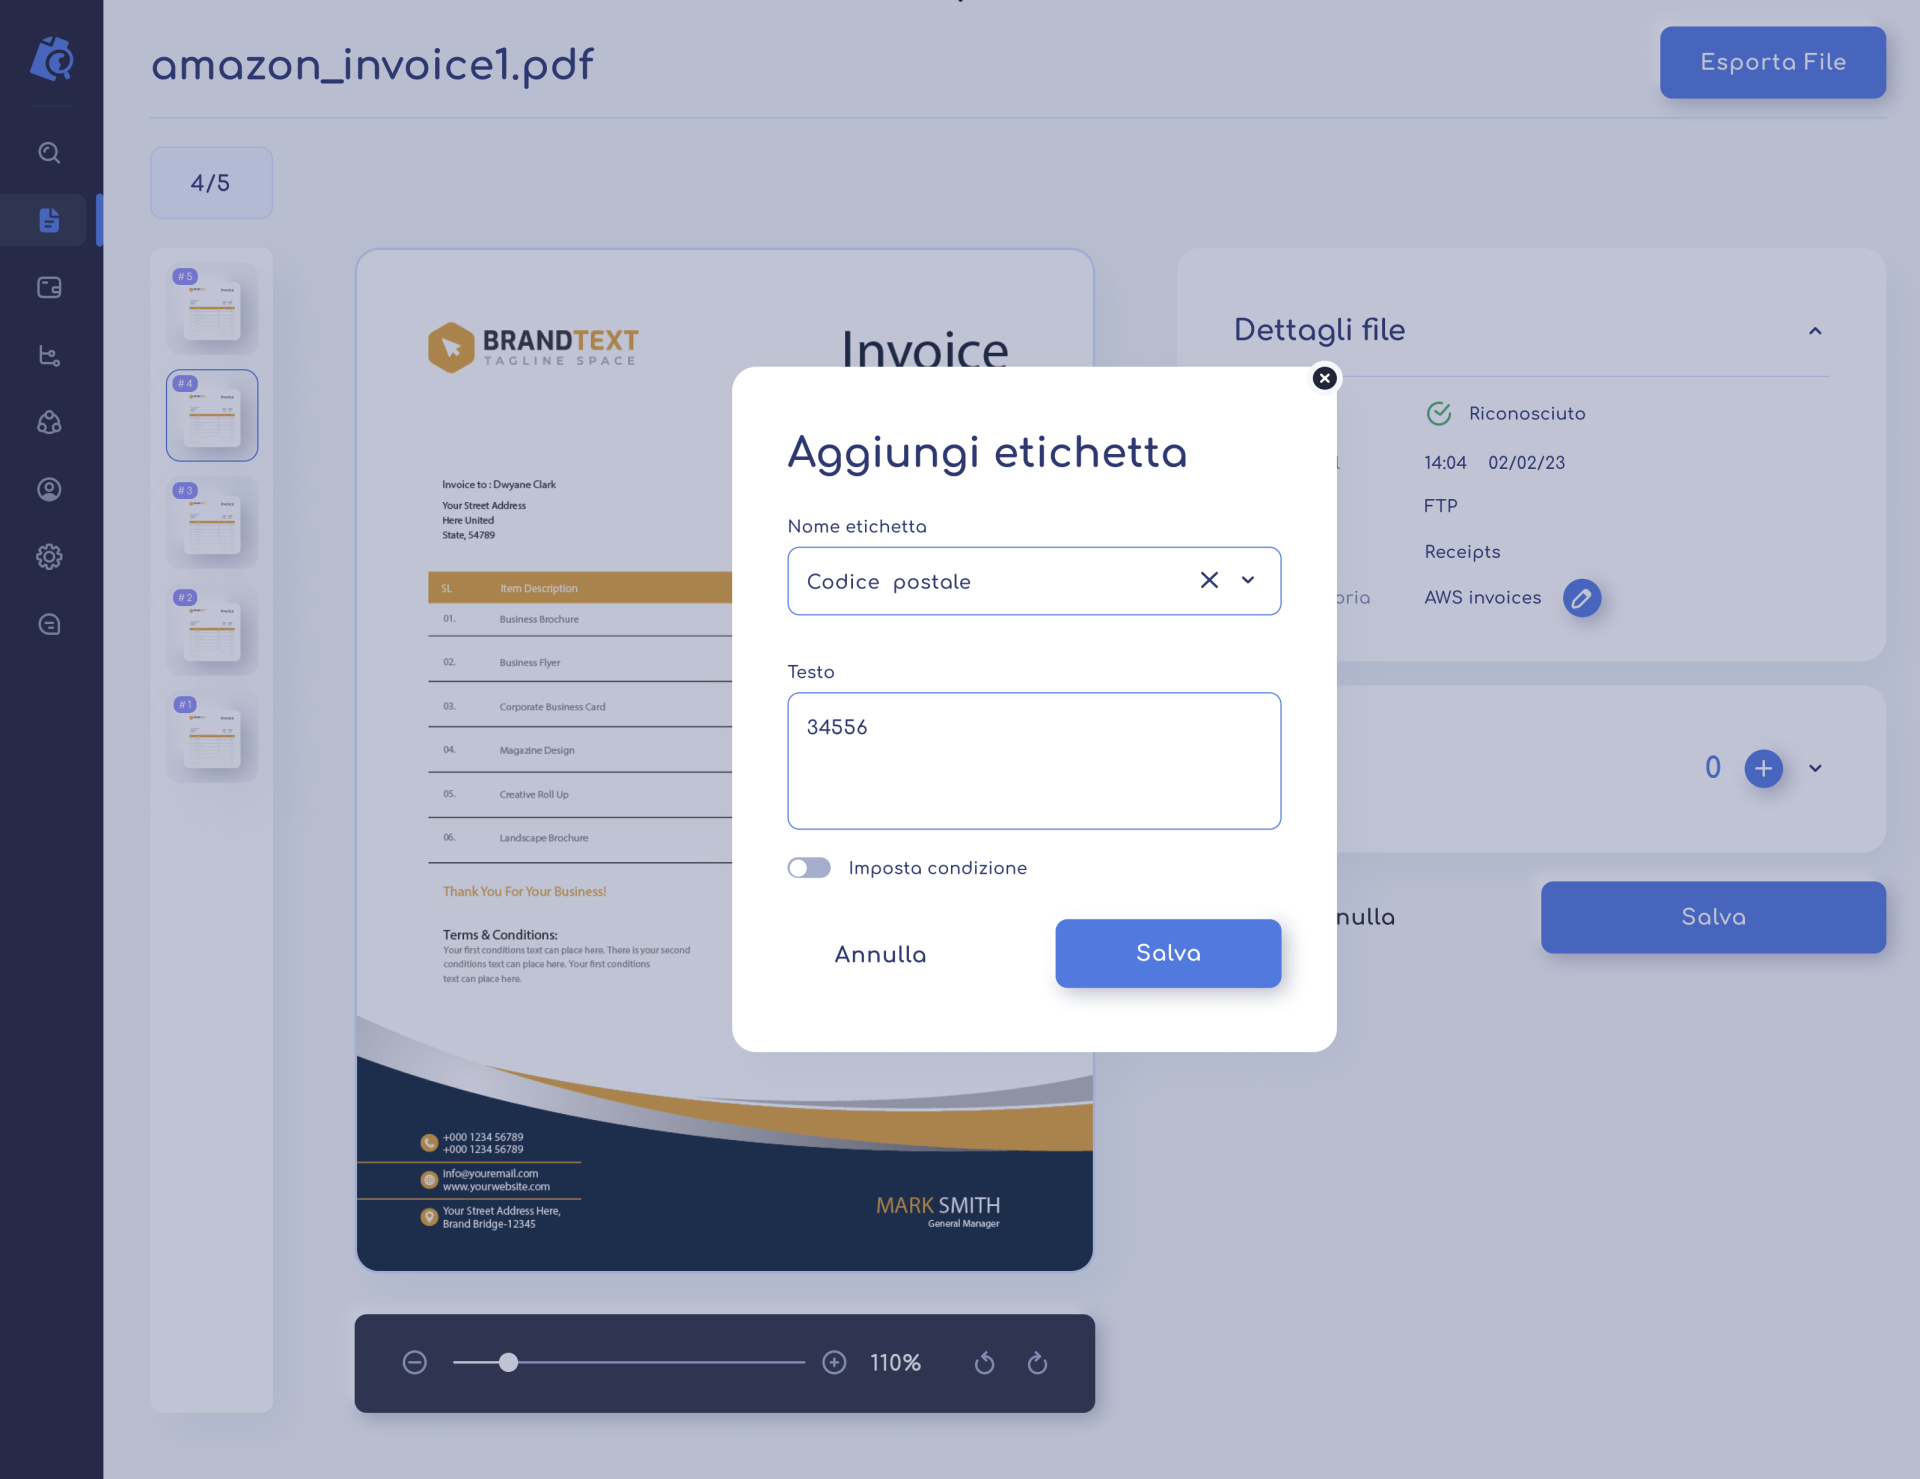
Automatically, Retica will open a pop-up window in which the selected text will appear in the “Text” field, and in the “Label name” field you will need to select or enter the name of the identified text (for example: “Postal code”).

By pressing the “Save” button, the new label will appear in the label block, and will be ready to be exported along with all the others.
It will be possible to delete a label using the red trash can button or modify it using the blue pen button (this will open the pop-up described above).
Once all the labels have been correctly mapped, by pressing the “Save” button it is possible to save the current configuration ready to be exported.


