Document Management
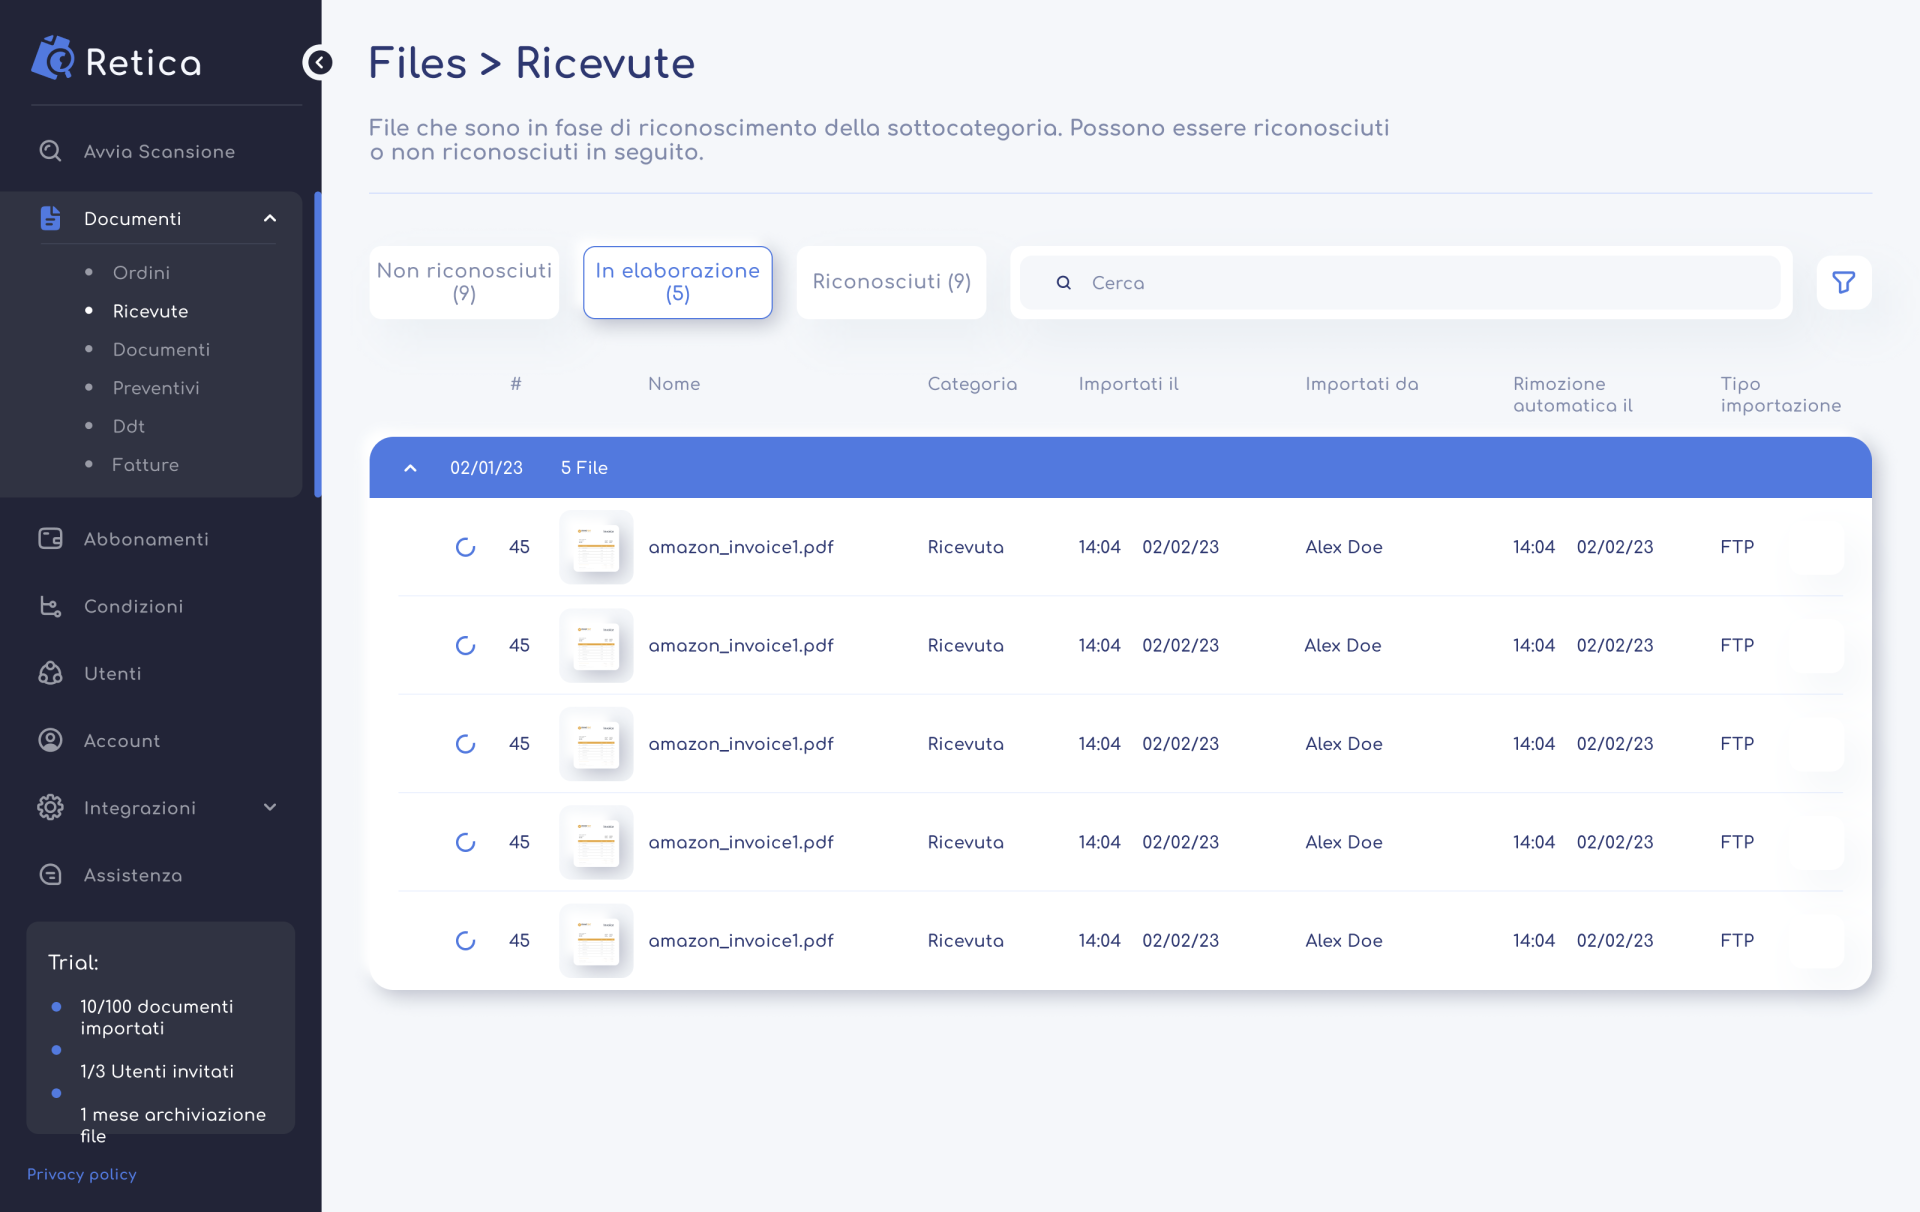
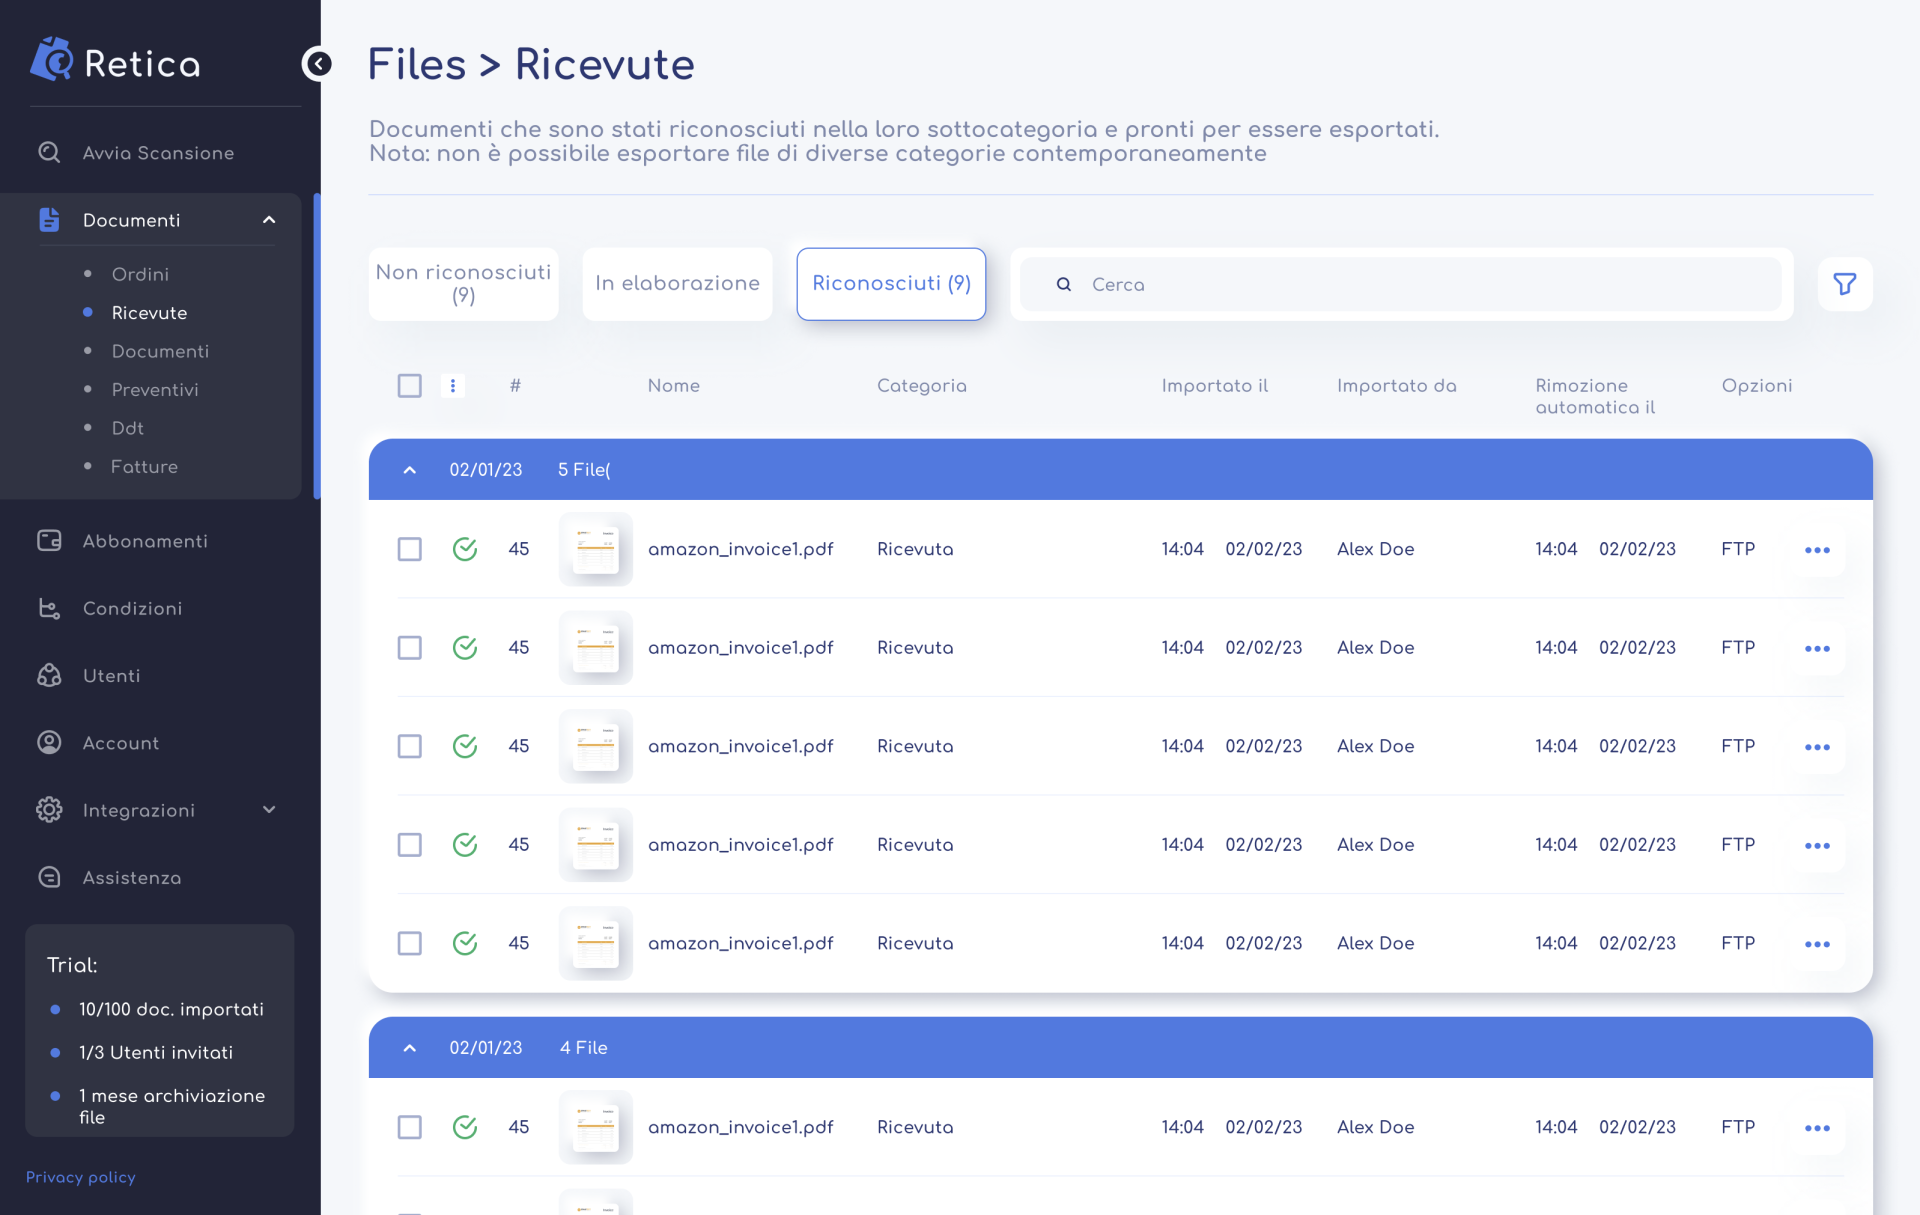
The documents section is dedicated to the management and storage of documents to be processed or processed. The uploaded files will be shown in this section and divided into 3 categories based on their processing status: Recognized, Not recognized or in processing
Documents in progress
Documents uploaded via the “Start Scan” section are displayed in the “Processing Documents” category and remain in this category until Retica has completed the analysis and processing.
Once this process is completed, Retica automatically moves them to the “Recognized” category if the labeling was performed correctly. Otherwise, if Retica was not able to recognize them correctly, the documents are moved to the “Unrecognized” category.

Recognized documents
To enter or change the credit card to use for subscription renewals, you need to enter the subscriptions section and select the “Payment method” tab.

By pressing the “Edit” button, Retica will direct you to the document labeling page, where you can add, delete or edit the document labels automatically detected by Retica. For standard templates, the changes will only apply to the selected document; if you want these changes to be permanent for future scans, you will need to use a custom template.
If you press the “Export” button instead, the export procedure will start. At this point, Retica will ask you if you want to perform a manual export or use the FTP protocol. With the manual export, Retica will download the output file directly from the browser, while with the FTP export you will be able to deposit the output file in the default FTP folder. In both cases, you will be able to choose the file extension you want to export between XLS, CSV, XML and JSON.
If you want to permanently delete the processed document, simply press the “Delete” button.
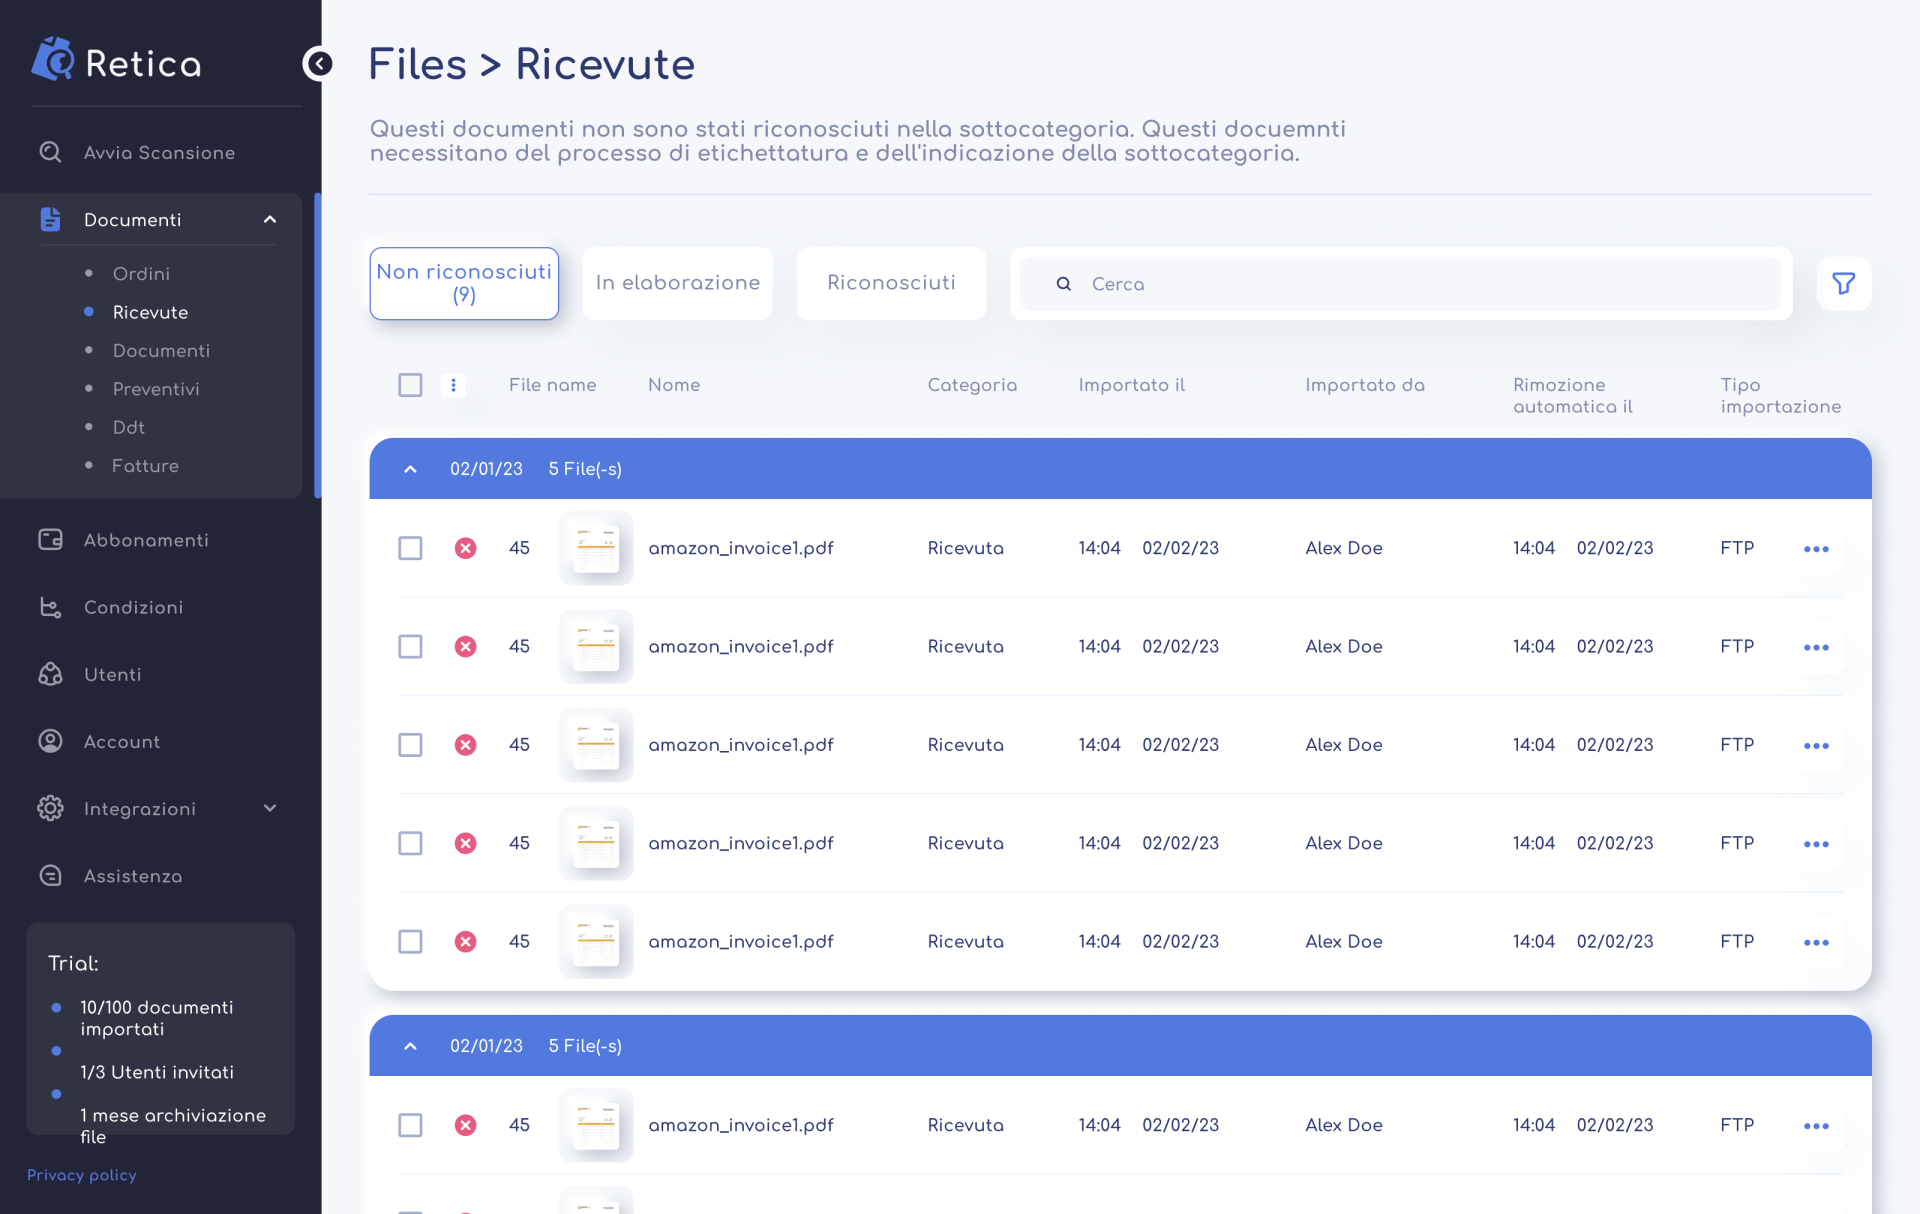
Documents not recognized
Documents remain available in this category for one month after processing, after which they are automatically deleted.
They are shown in a table that keeps them divided based on the day they were processed, and shows different information for each document.
On the right side of the table, for each document there is an “Options” button that allows the user to interact with it through the following actions: Edit and Delete.

By pressing the “Edit” button, Retica will direct you to the document labeling page, where you can select the text you want to detect and export. For standard templates, the changes will only apply to the selected document; if you want these changes to be permanent for future scans, you will need to use a custom template.
Once you have completed selecting the desired texts from the document and pressed the “Save” button, the document will be transferred to the “Recognized” category and will be ready for export.
If you want to permanently delete the unrecognized document, simply press the “Delete” button.


