Support & Downloads

Quisque actraqum nunc no dolor sit ametaugue dolor. Lorem ipsum dolor sit amet, consyect etur adipiscing elit.

s f

Contact Info
198 West 21th Street, Suite 721
New York, NY 10010
foton@qodeinteractive.com
+88 (0) 101 0000 000
Follow Us

Conditions

Conditions are an effective tool for converting texts identified by Retica into formats that business software can understand.

You can create different lists of conditions, each of which allows you to specify the texts to be replaced and those with which they will be replaced.

Let’s take a closer look at how they work.

Create a list of conditions

To get started, it is essential to go to the “Extensions” section, press the “Add Extension” button, and then add the “Conditions” extension to your active extensions:

Once added, it will be visible among the active extensions.

To begin the configuration, press the “Options” button of the extension and select “About”.

Once inside the section dedicated to conditions, click on “Add list” to create the first list of conditions.

After entering the name of the list and pressing “Save”, you will have created a list of conditions. This list acts as a container for the texts that you want to automatically replace in the document. The next step will then be to enter these values.
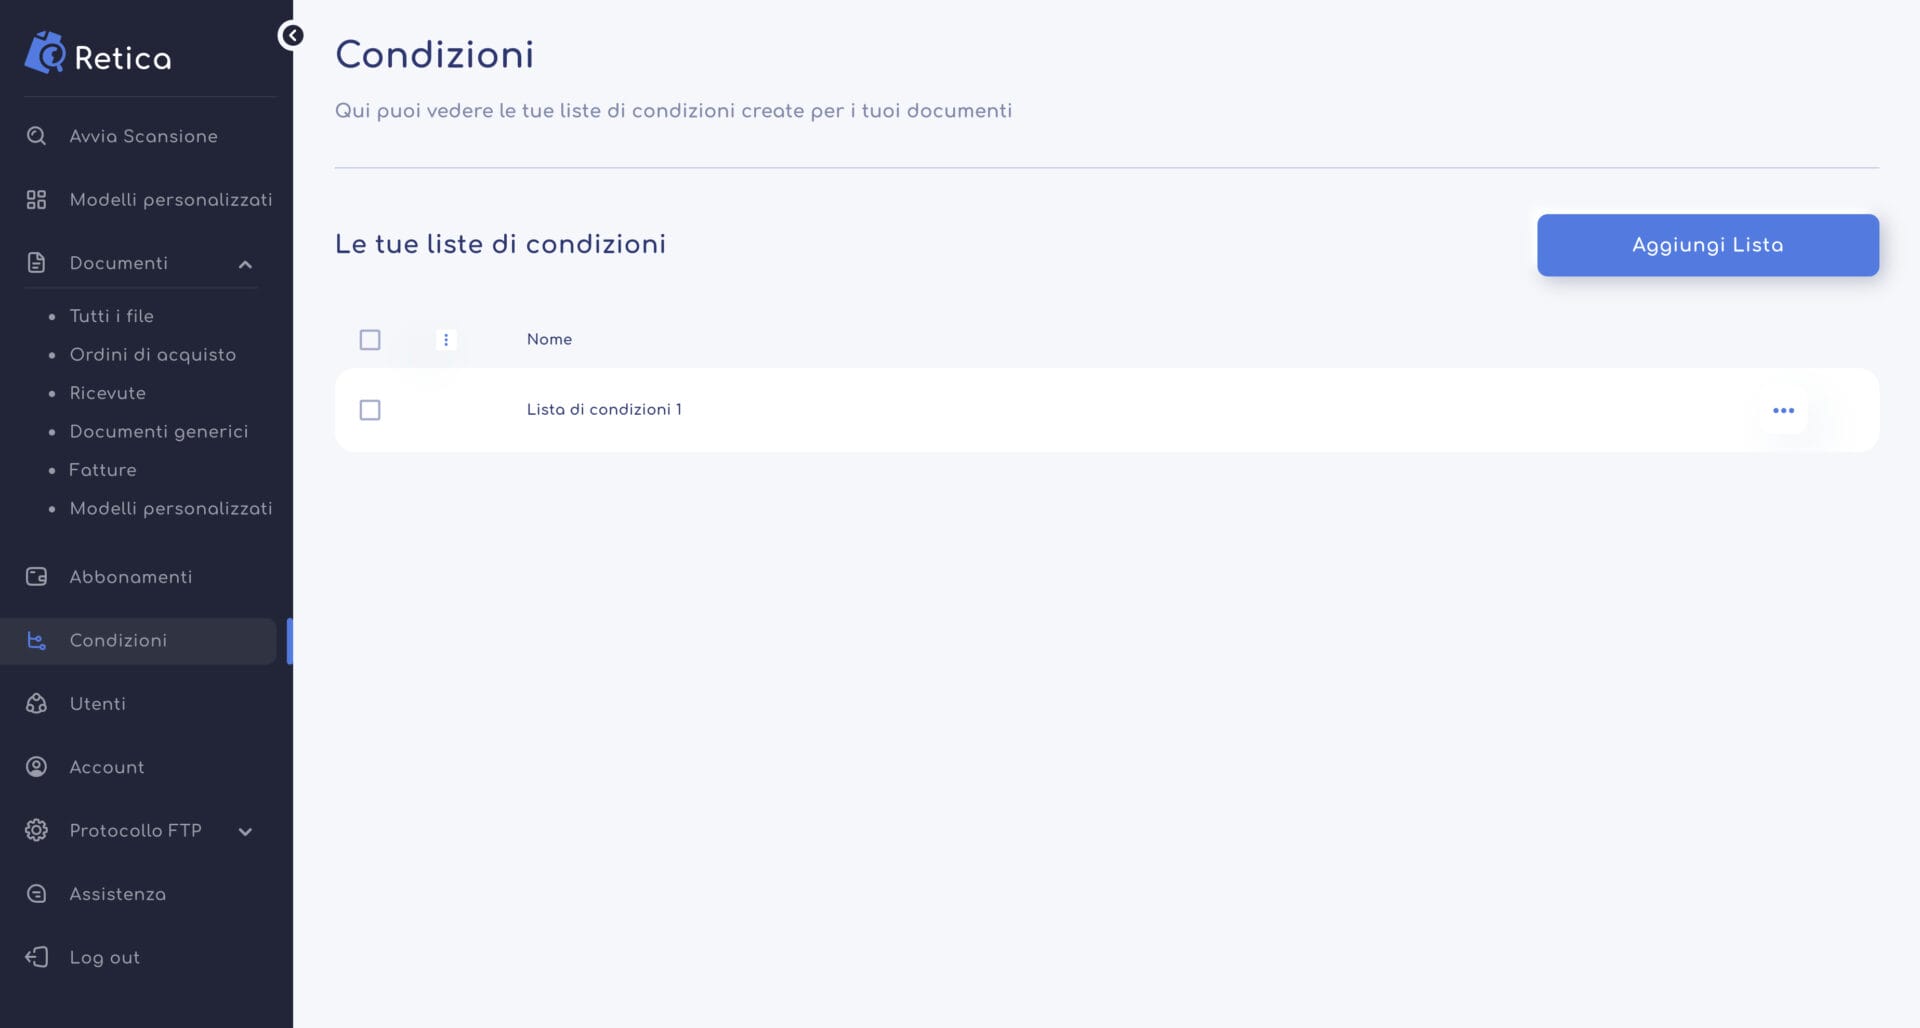
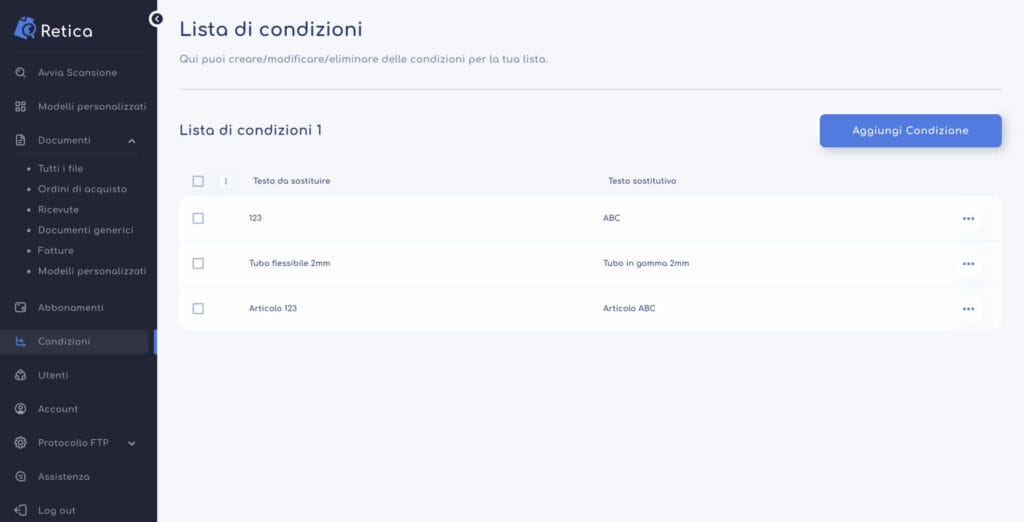
Once the list has been created, simply click on the “Options” button and then select “Information” to access the list and start defining the conditions.

To proceed, simply press on “Add condition”. This action will open a window where you can enter the text to be replaced (“Text to replace”) and the text with which it will be replaced (“Replacement text”).

Once you have entered both texts and pressed the “Save” button, the new condition will be added to the list. Repeat this operation for all the texts you want to automatically replace in the output file.
Apply the list of conditions to a document
After starting the scan of a document and viewing the result in the “My Documents” section, you can apply the conditions to the entire document or just to individual labels.

To apply the conditions to the entire document, you must follow these steps:

  1. Click on the options button associated with the document in question to open the drop-down menu.
  2. In the drop-down menu, select the “Edit” option.
  3. Inside the document editing view, press the blue pencil-shaped button located next to the “Conditions” item, present in the right block called “File Detail”
  4. Select the list of conditions that you want to apply to the entire document

Once you have chosen the list of conditions and pressed the “Apply” button, all the texts identified in the document present in the list of conditions chosen will be automatically replaced.

Then just press the “Save” button and the configuration will be saved ready for export.

To apply conditions to a single text instead, you need to follow these steps:

  1. Click on the options button associated with the document in question to open the drop-down menu.
  2. In the drop-down menu, select the “Edit” option.
  3. Within the document editing view, locate the specific label or value in the table to which you want to apply the conditions.
  4. Select the desired label or value.

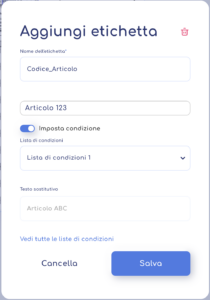
To apply specific conditions:

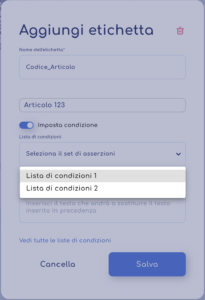
  1. Activate the switch next to “Set Condition”.
  2. Select the desired list of conditions for the text in question.
  1. Once you have made your selection, the replacement text will automatically be displayed.
  2. Press the “Save” button and repeat this process for other texts to which you want to apply conditions.
 

  1. Save the changes you made to the document.
  2. Export the document in the format of your choice.

Apply the list of conditions to multiple documents

To apply a list of conditions to multiple documents at once, follow these steps:

  1. Select one or more documents from the “My Documents” table.
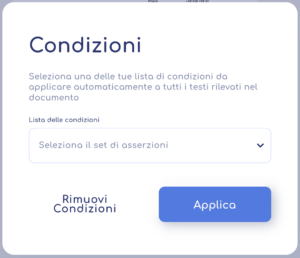
  2. Press the generic “Options” button, and select the “Conditions” item.
  3. From the pop-up window that appears, select one of the available lists of conditions.
  4. Then, press the “Apply” button.
  5. The conditions will then be applied to the selected documents.